
Hadoop 3.1.4 Installation on Window 10
Below is the procedure in Installing Hadoop
Prepare:
Then you can use actively Hadoop on your system
- Download Hadoop 3.1.4 mirror file Link
- Java JDK 1.8.0 Link to download
NOTE: Hadoop 3.2.1 have some bugs so the NameNode and DataNode shuts-down.
Set up
-
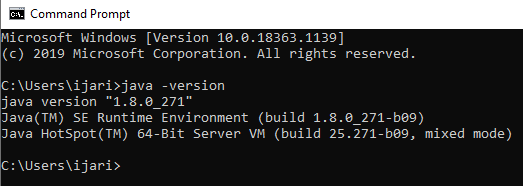
Go to cmd and check if Java is alreaddy installed on your system, use “java -version”
-
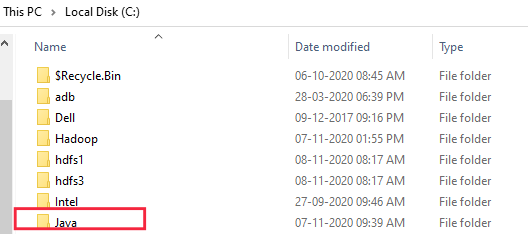
If Java is not installed on your system then first install java by selecting the location as “C:\JAVA” . If while installation it pops another the destination folder keep it default and run
-
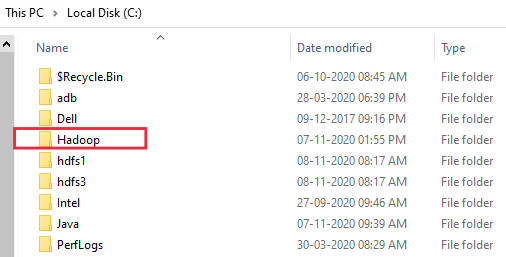
Once Hadoop is installed check if it installed correctly, “hadoop version”. Next, Extract file Hadoop 3.1.4.tar.gz or Hadoop-3.1.4.zip and place under “C:\Hadoop- 3.1.4” else rename it to “C:\Hadoop”
-
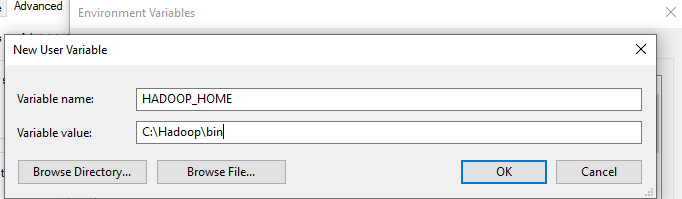
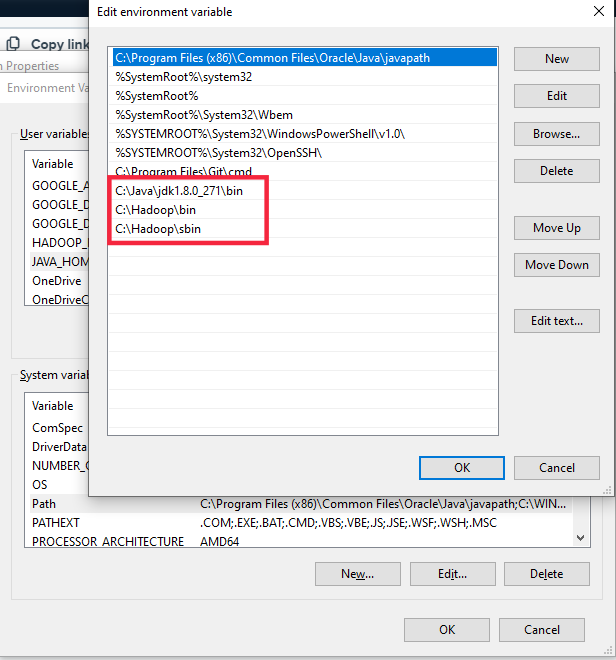
Set the path HADOOP_HOME Environment variable on windows 10. Right click MyPc -> Go to Properties -> Choose Advanced system settings -> Click on Environment Variable. Next click on New on user variable and name it to HADOOP_HOME and set location to C:\Hadoop\bin
-
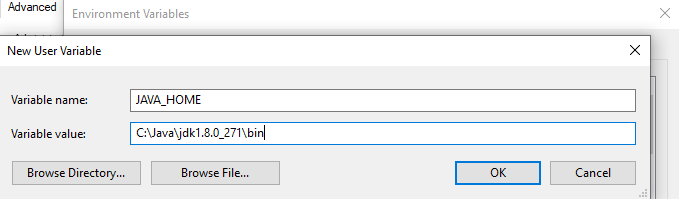
Similarly, set the path JAVA_HOME Environment variable on windows 10 and choose the location to C:\Java\jdk1.8.0_271\bin
-
Next we set the Hadoop bin directory path and JAVA bin directory path.
Configuration
1.Edit file C:/Hadoop/etc/hadoop/core-site.xml, paste below xml paragraph and save this file.
<configuration>
   <property>
       <name>fs.defaultFS</name>
       <value>hdfs://localhost:9000</value>
   </property>
</configuration>
2.Similarly edit file C:/Hadoop/etc/hadoop/mapred-site.xml, paste below xml paragraph and save this file.
<configuration>
   <property>
       <name>mapreduce.framework.name</name>
       <value>yarn</value>
   </property>
</configuration>
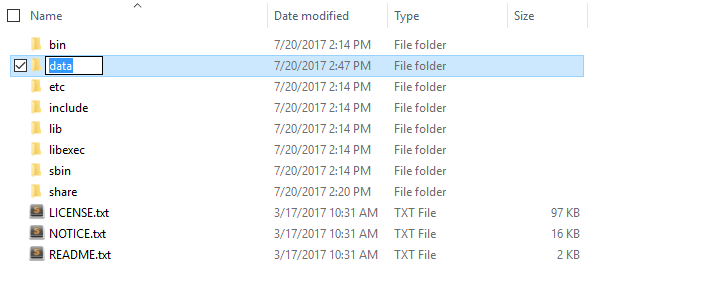
3.Create folder “data” under “C:\Hadoop”
- Create folder “datanode” under “C:\Hadoop\data”
- Create folder “namenode” under “C:\Hadoop\data”
4.Edit file C:\Hadoop/etc/hadoop/hdfs-site.xml, paste below xml paragraph and save this file.
<configuration>
   <property>
       <name>dfs.replication</name>
       <value>1</value>
   </property>
   <property>
       <name>dfs.namenode.name.dir</name>
       <value>C://hadoop/data/namenode</value>
   </property>
   <property>
       <name>dfs.datanode.data.dir</name>
       <value>C://hadoop/data/datanode</value>
   </property>
</configuration>
5.Edit file C:/Hadoop/etc/hadoop/yarn-site.xml, paste below xml paragraph and save this file.
<configuration>
   <property>
    	<name>yarn.nodemanager.aux-services</name>
    	<value>mapreduce_shuffle</value>
   </property>
   <property>
      	<name>yarn.nodemanager.auxservices.mapreduce.shuffle.class</name>
	<value>org.apache.hadoop.mapred.ShuffleHandler</value>
   </property>
</configuration>
6.Edit file C:/Hadoop/etc/hadoop/hadoop-env.cmd by closing the command line “JAVA_HOME=%JAVA_HOME%” instead of set “JAVA_HOME=C:\Java\jdk1.8.0_271”

Hadoop Configuration
- Dowload file Hadoop Configuration.zip
- Delete file bin on C:\Hadoop\bin, replaced by file bin on file just download (from Hadoop Configuration.zip).
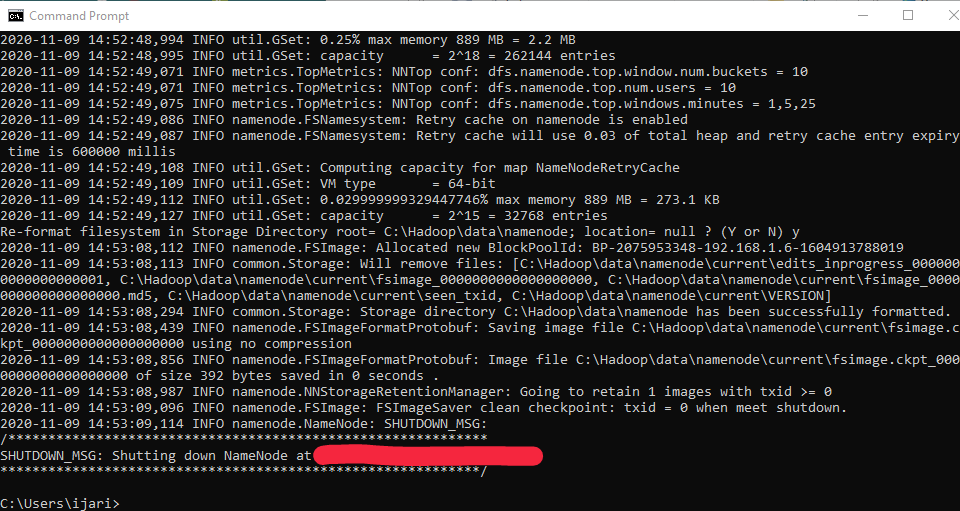
- Open cmd and typing command “hdfs namenode –format” . You will see
Testing
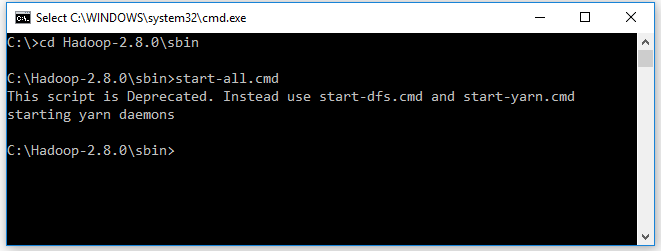
- Open cmd and change directory to “C:\Hadoop-2.8.0\sbin” and type “start-all.cmd” to start apache.
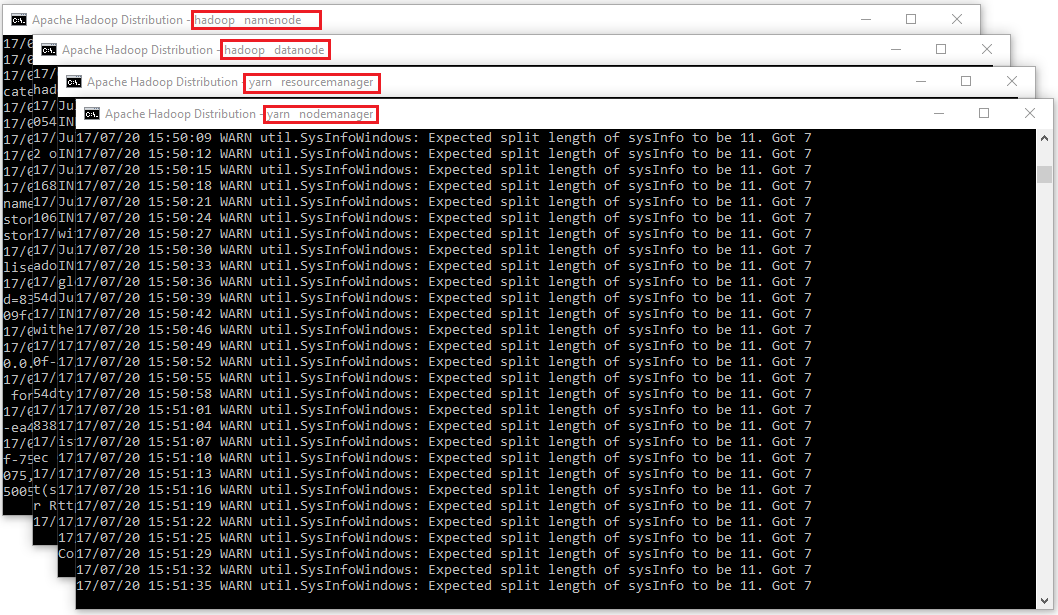
- Make sure these apps are running- Use Jps to see the resources running
- Hadoop Namenode
- Hadoop datanode
- YARN Resourc Manager
- YARN Node Manager
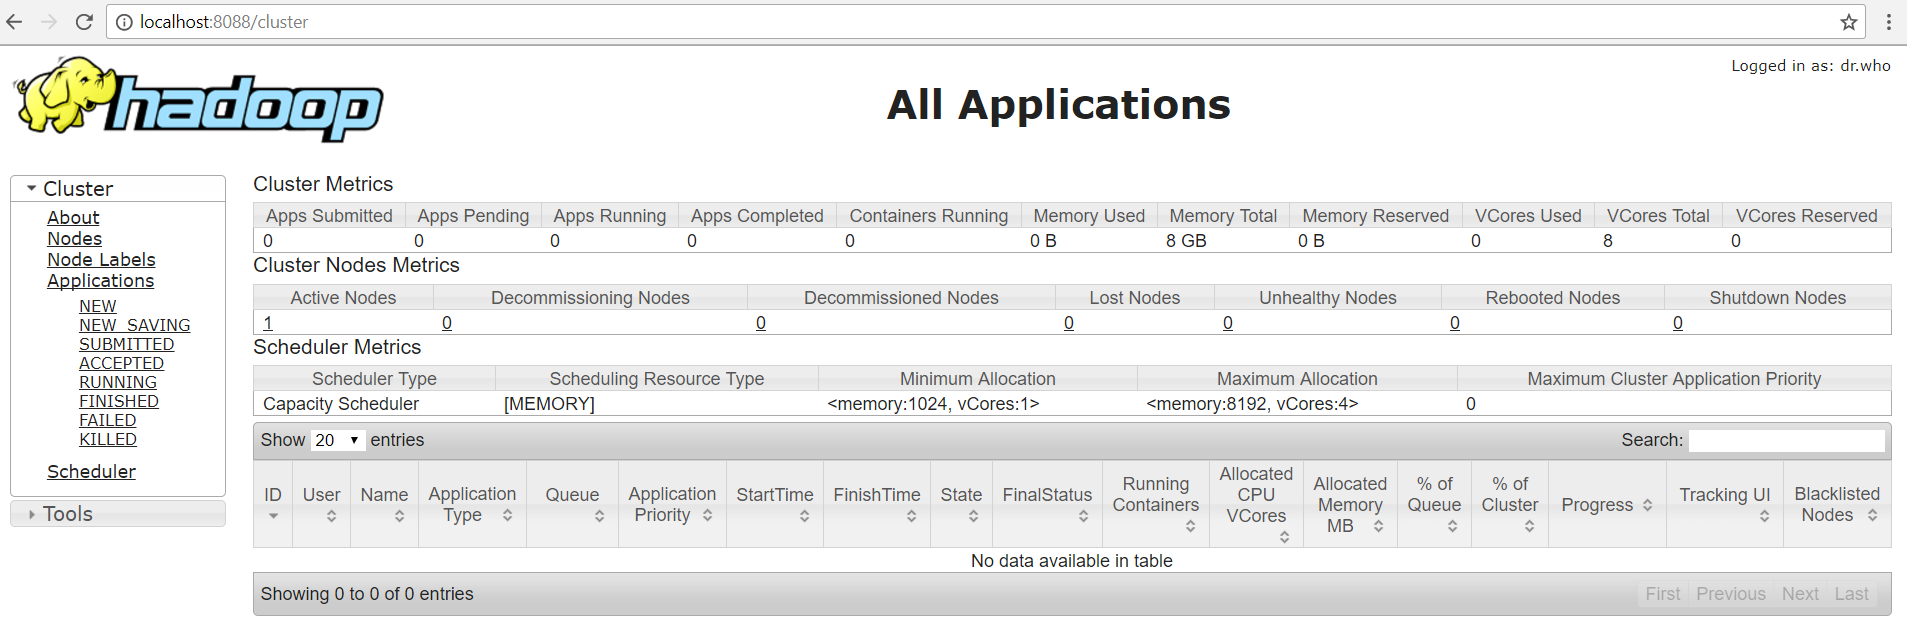
- Open: http://localhost:8088
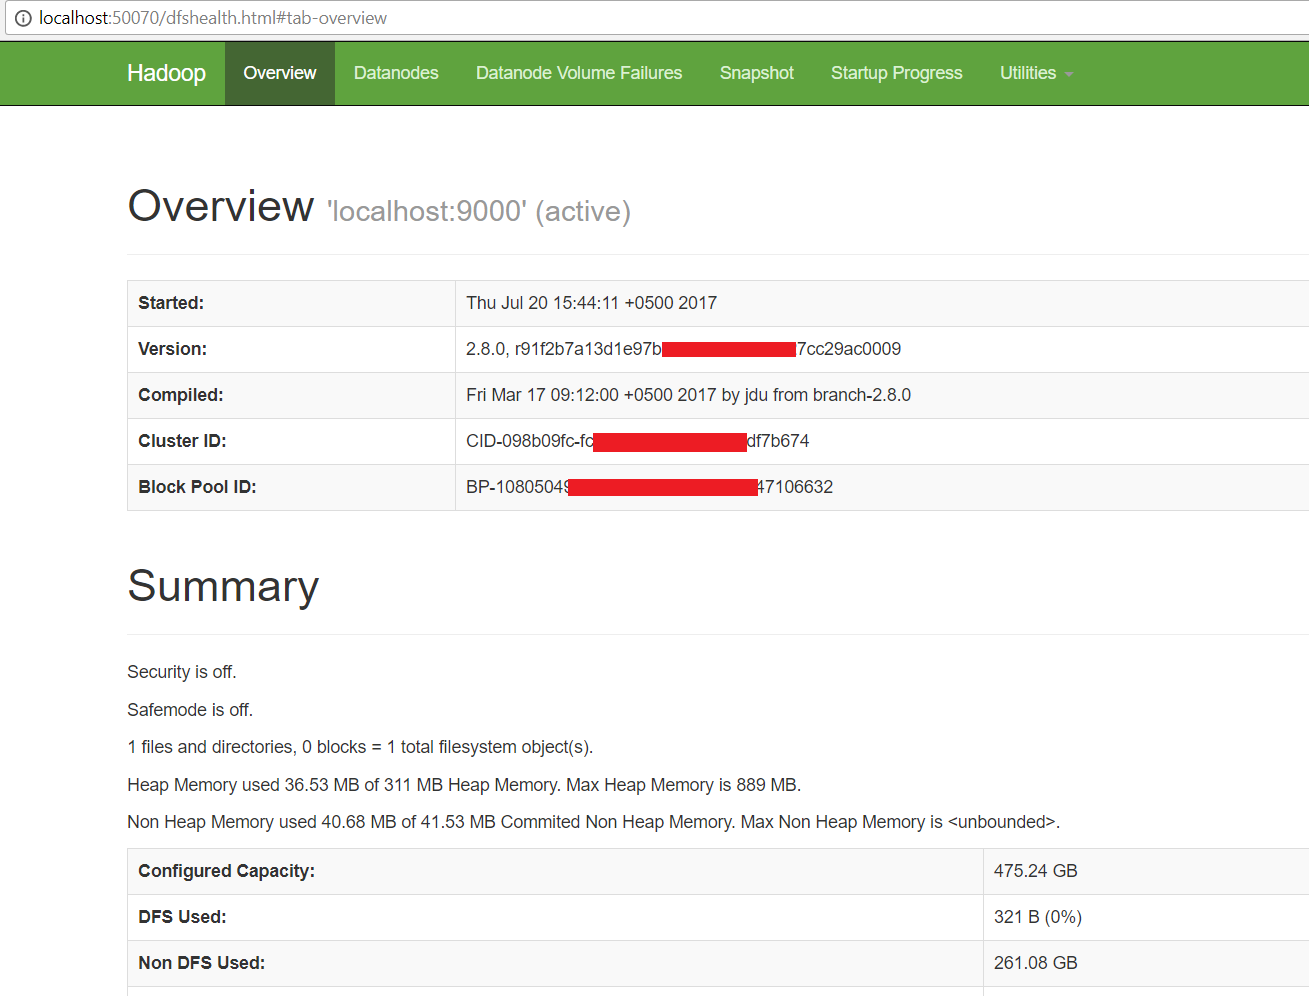
- Open: http://localhost:9870
Congratulations, Hadoop installed.